Overview
Choosing version control software isn’t as straightforward as it first appears. Businesses face a long list of questions: Should we use a cloud-hosted service or run our own infrastructure? What features do we actually need from a version control platform? And do we use it enough to justify paying significant licensing costs to large vendors?
In practice, most teams end up choosing between GitHub and GitLab. Each platform caters to different priorities – GitLab often appeals to teams focused on integrated CI/CD and DevOps workflows, while GitHub is widely used for general development and collaboration. Debating which is “better” isn’t the goal here, though.
Instead, this post focuses on what both platforms are built on: Git – and how you can take full control of it yourself.
That’s where Gitea comes in.
Please Note: This guide is up to date as of at least January 2026.
Installing Gitea (Docker)
Overview
There are many ways to install Gitea into a production environment. A full overview of the many ways to install can be found at Gitea’s official documentation.
Docker Compose
For this demonstration, I’ve chosen to install Gitea using their official Docker image using Docker Compose.
If you don’t have docker compose installed, refer to the official Docker documentation.
It allows for a quick and easy setup with easy management, so let’s go over how we can install it, this example running on Debian GNU/Linux 12 (bookworm) within a Proxmox LXC, though you can use whatever you like!
Firstly, we will create our working directory:
mkdir gitea
cd gitea
Next, we will create a docker-compose.yml file:
touch docker-compose.ymldocker-compose.yml will be used to stored the Docker Compose config for creating the container running Gitea.
Next, let’s fill out our docker compose file:
services:
  db:
    image: postgres:16 #postgress image as of Jan 2026
    container_name: gitea-db
    restart: always
    environment:
      POSTGRES_USER: gitea
      POSTGRES_PASSWORD: password #replace password
      POSTGRES_DB: gitea
    volumes:
      - ./db:/var/lib/postgresql/data #postgres db binded to ./db

  gitea:
    image: gitea/gitea:latest #use latest gitea image
    container_name: gitea
    restart: always
    depends_on:
      - db #ensure that the postgres db is running
    environment: #set user permissions and link to postgres db
      USER_UID: 1000
      USER_GID: 1000
      GITEA__database__DB_TYPE: postgres
      GITEA__database__HOST: db:5432
      GITEA__database__NAME: gitea
      GITEA__database__USER: gitea
      GITEA__database__PASSWD: password #replace password
    volumes:
      - ./data:/data #gitea data binded to ./data
    ports:
      - "3000:3000" #forward container port 3000
This docker-compose.yml config is taken directly from Gitea’s official documentation, running a Postgres database. I’ve added some comments to clarify parts of the config.
You must replace GITEA__database__PASSWD: password and POSTGRES_PASSWORD: password in both instances with a strong password for the Postgres database – these must match.
Final Setup
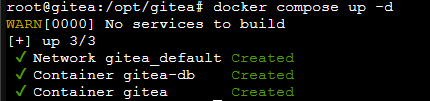
Now we can run the following from our working directory:
docker compose up -dAfter that, we see the following output:
To complete setup, we traverse on a web browser within the same network to http://<host IP>:3000
There, we are presented with some options to fill in the first time we get there. The most important one to ensure is correct is setting SSH port to 2222 – as we set this to be forwarded via that port on the host in our docker-compose.yml.
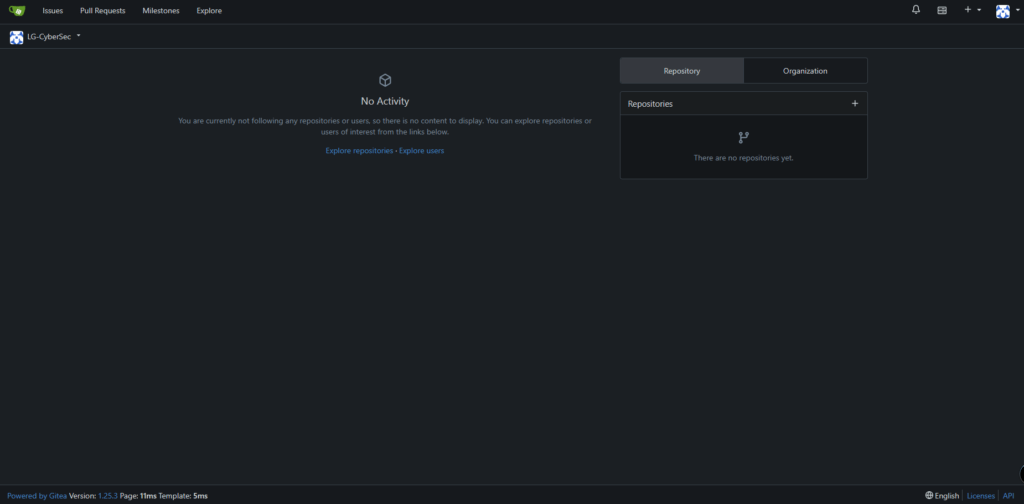
Once we have filled that out and created our admin account, the webUI should look like this:
HTTPS Setup
While we won’t go into detail into how you can secure Gitea via HTTPS for internet facing instances – as it is out of scope here – we can recommend the use of Caddy for simple HTTPS setup.
It has it’s own docker image, making it ideal paired with this setup and can be used to implement secure automatic HTTPS and is quick and easy to setup. You can find more details of setting it up from Caddy’s official documentation.
Follow docs found here for additional HTTPS Setup steps in Gitea.
If you are exposing your Gitea instance to the internet, please ensure you set up firewall rules accordingly and setup other security monitoring to secure you instance.
Upgrading Gitea
Now that Gitea is all up and running, we just need to ensure it’s always up to date. Thankfully, since we installed via Docker Compose, this is very simple – from our working directory, run the following (edit docker-compose.yml to update the version, if you have one specified other than ‘latest’):
# Pull new images
docker compose pull

# Start a new container, automatically removes old one
docker compose up -d
Gitea Runners
A key feature of Gitea is the use of runners. These runners allow the instance to run tasks described via the Workflow Syntax for Github Actions. That’s right, remember how we mentioned Github at the start, this feature works almost the exact same as it does in Github and uses the same syntax!
We’ll get into more detail on how to use them later, but first, let’s get a runner installed and configured in Gitea.
Installation (Docker Compose)
Since we already set Gitea up using Docker Compose, we may as well do the same for the runner’s, this can be on the same machine or different machine on the same network, but it’ll just need a couple tweaks depending on how you choose to set it up.
Fistly, let’s set up our working directory:
mkdir gitea-runner
cd gitea-runner
Next, we’ll create another docker-compose.yml file for Docker Compose config, and a .env for environment variables – we find the .env easiest in case environment variables need tweaking later on:
touch docker-compose.yml
touch .env
Now we can edit the docker-compose.yml file to contain the following (none of this needs changing) – I’ve added some comments to the code for some explanations:
version: "3.8"
services:
  runner:
    image: docker.io/gitea/act_runner:nightly #nightly release
    environment: #the below fields will be filled via .env
      GITEA_INSTANCE_URL: "${INSTANCE_URL}"
      GITEA_RUNNER_REGISTRATION_TOKEN: "${REGISTRATION_TOKEN}"
      GITEA_RUNNER_NAME: "${RUNNER_NAME}"
    volumes:
      - ./data:/data #runner config binded to ./data
      - /var/run/docker.sock:/var/run/docker.sock
And finally, let’s setup the .env file. The fields below need tweaking to match you environment – I’ve added placeholders for you to change them:
INSTANCE_URL=http://<GITEA IP ADDRESS>:3000
REGISTRATION_TOKEN=<TOKEN>
RUNNER_NAME=runner-1
As stated, these need tweaking, the INSTANCE_URL is just the URL of your gitea instance (IP or domain). The RUNNER_NAME can be whatever you like. Additionally, labels can be added to the docker-compose.yml and .env file as specified in the documentation – here, we leave it empty to use the default ‘ubuntu-latest’. However, the REGISTRATION_TOKEN requires a couple extra steps:
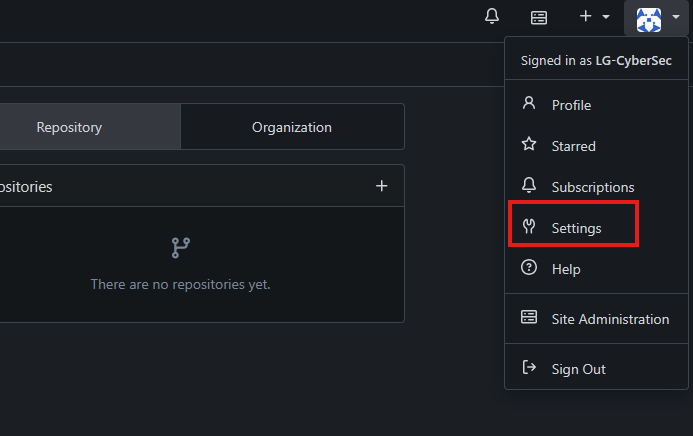
Firstly, click your Profile and click on Settings.
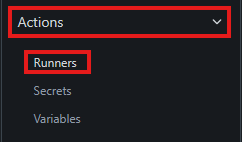
Next , click the ‘Actions’ dropdown and hit ‘runners’.
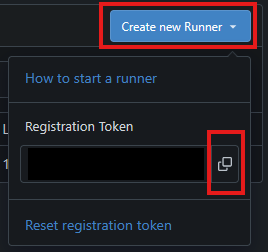
Select ‘Create new Runner’ and copy the ‘Registration Token’.
Now that is all setup, run the following to start your runner’s container:
docker compose up -dOnce that container starts up, you should find your new runner appear in the same menu above that we grabbed the ‘Registration Token’ from.

I have named mine ‘runner-1’.
That’s it! Your first Gitea runner is alive. You can add more by following the same steps to add as many runners as you will need. This will depend on the workload that your Gitea instance will use, but for our examples, one is enough! If your going to use this in an enterprise environment to spin up whole networks using Terraform and Ansible in a CI/CD pipeline using Gitea Actions… you may need more.
Using Gitea
Now for what everyone has been waiting for, how do we actually use Gitea? Well, if you’ve used other version control software before, such as Github or Gitlab, it’s very much similar, from the webUI, to using Git in CLI.
Gitea is vast in features, so we won’t get into loads of detail of everything for this blog, however, we will dive into some key features which mostly everyone will use.
Basic WebUI Usage
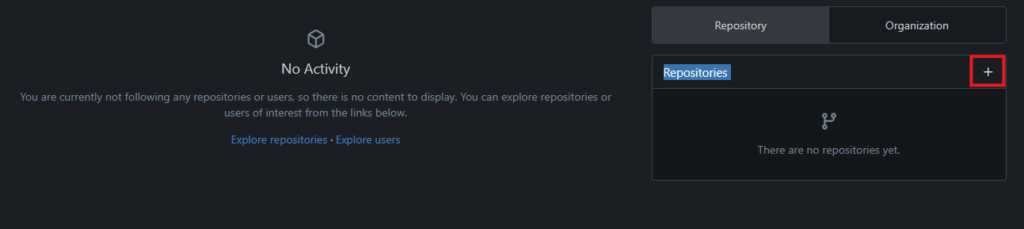
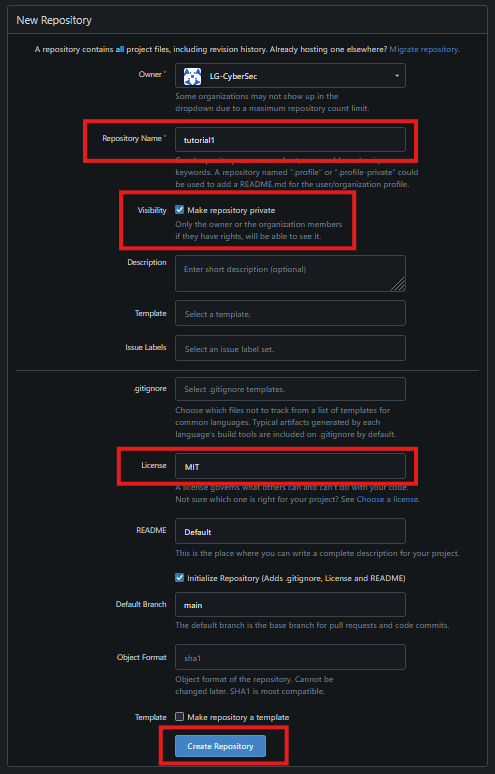
Let’s dive into the webUI and basic features. Firstly, we’ll start with creating repositories. To create a repository in the WebUI, from the main menu, in the Repositories box, hit the + button.
This will bring up a screen to configure the repo how you would like, here, I’ll give it a name, add an MIT license and make it private.
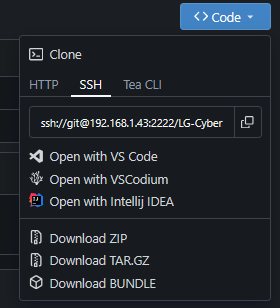
Now you’re repo is created, it looks very similar to Github. You can add files, clone your code to a local directory via SSH, etc. Create/manage issues, Run Actions (more detail on this later), manage projects, activity, wiki, etc. It’s pretty feature rich!
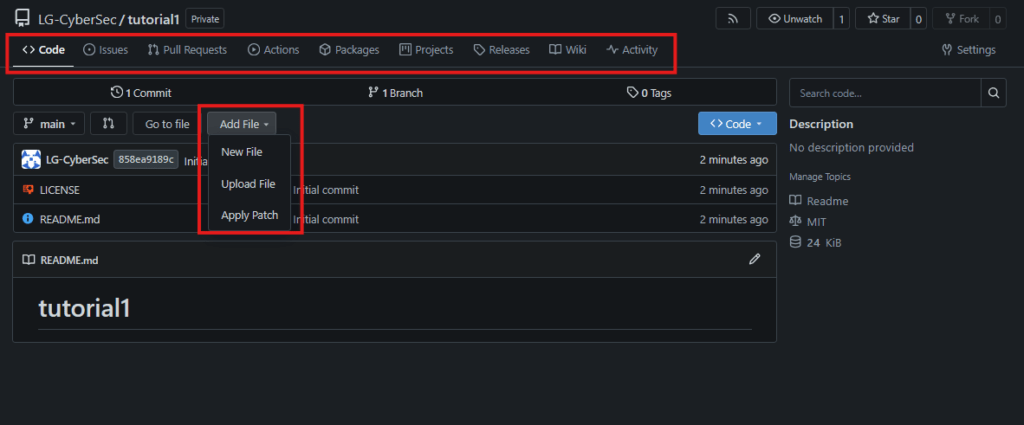

Like I said previously, it’s difficult to go over all these features in this blog, so I’d recommend referring to the official Gitea Usage Documentation to explore all the features further.
Gitea Actions
Gitea, similarly to Github, has an ‘Actions’ menu allow you to automate actions and create pipelines which run directly through Gitea runners. You specify the workflow in your repo (using Github’s syntax) and can run them in many different ways, from when new content is pushed/pulled to on schedules, and manual clicks.
Here, we will go into a basic example of Actions, which will only run our test.py (hello world) file in python, however, much more details Github Workflow Documentation is available.
In our repo, we create file /.github/workflows/actions.yml and fill it following Github Workflow Syntax. Here is an example:
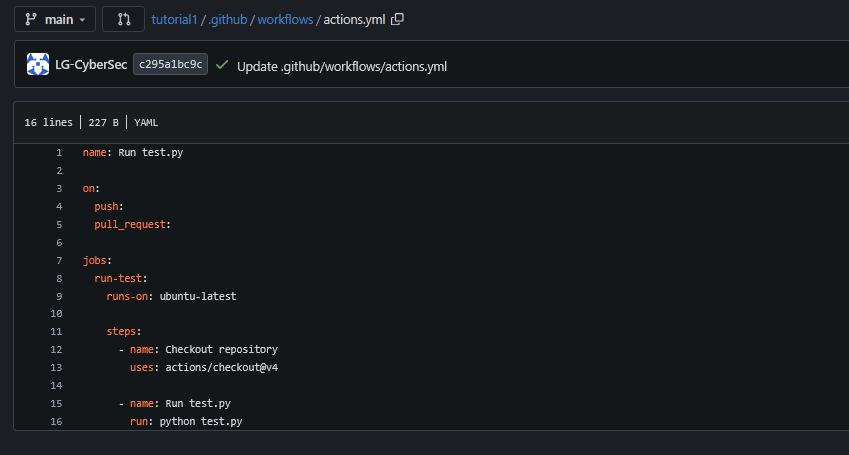
Next, run this manually in the Gitea Actions menu:

And we have our outputted text! Yes, this is a very basic example, but this can be scaled as far as your imagination.
CLI using Git
We won’t go in depth on using all git CLI with Gitea, like previously mentioned, the official documentation go over this nicely.
Editor’s Note
Gitea is a practical, open-source Git platform. It balances simplicity, performance, and control. For consumers and individual developers, it provides an easy-to-use, lightweight alternative to larger Git hosting services. It is fast to set up, resource-efficient, and free from vendor lock-in. For businesses, Gitea offers strong value through self-hosting, data ownership, and flexible deployment. This makes it well suited for internal teams, regulated environments, and cost-conscious organizations. An active community, broad integrations, and steady development ensure Gitea remains reliable and scalable for projects of any size.